- Published on
Adding free HTTPS/SSL certificate to Kubernetes service with Istio, Let's Encrypt and cert-manager
Before we start the tutorial, I will assuming that you have a running Kubernetes cluster, with the ability to allocate a public IP address to your service, because we will need it to be accessible from the internet.
Install Istio
Let's start by installing Istio in your Kubernetes cluster. You can follow the guide on the official Istio website but here is the command to install Istio with the default profile:
istioctl install -y
After several minutes, you should be able to see the Istio ingress gateway service running in the istio-system namespace with a public IP address:
kubectl -n istio-system get svc istio-ingressgateway
NAME                   TYPE           CLUSTER-IP     EXTERNAL-IP     PORT(S)                                      AGE
istio-ingressgateway   LoadBalancer   10.3.252.105   34.150.16.112   15021:30694/TCP,80:31846/TCP,443:30717/TCP   2m47s
Configure DNS record for your domain
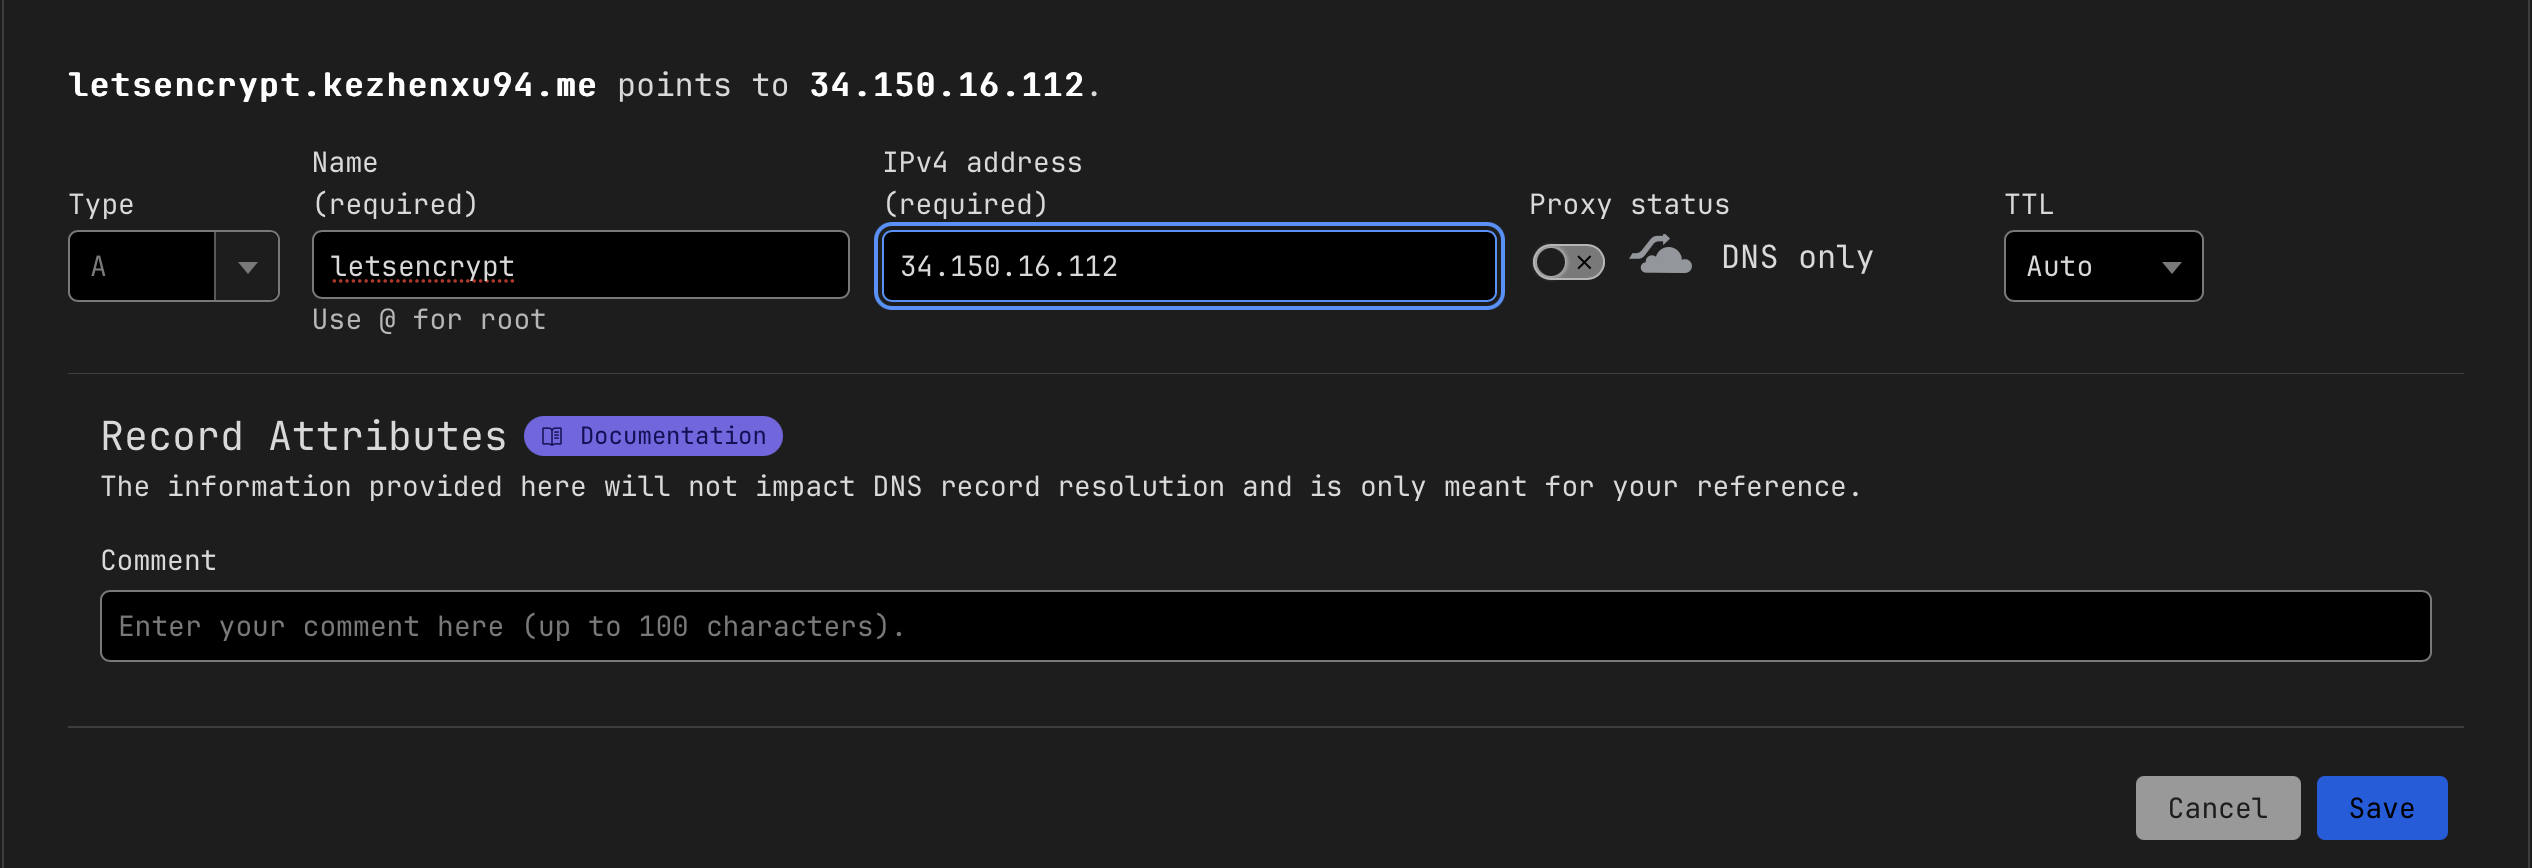
In the last step, we have obtained the public IP address of the Istio ingress gateway service, now we need to configure a DNS record for your domain to point to this IP address.
In this tutorial, I'm going to use the domain letsencrypt.kezhenxu94.me as an example, you should replace it with your own domain name.
You can do this by adding an A record to your domain's DNS settings, with the value of the public IP address, I'm using Cloudflare as my DNS provider, so here is how I do it:
Install cert-manager
cert-manager is a powerful and extensible X.509 certificate controller for Kubernetes and OpenShift workloads. It will obtain certificates from a variety of Issuers, both popular public Issuers as well as private Issuers, and ensure the certificates are valid and up-to-date, and will attempt to renew certificates at a configured time before expiry.
We will obtain and re-new certificates by leveraging cert-manager, let's install it according to the official guide:
helm repo add jetstack https://charts.jetstack.io --force-update
helm install \
  cert-manager jetstack/cert-manager \
  --namespace cert-manager \
  --create-namespace \
  --version v1.16.2 \
  --set crds.enabled=true
Install example service
Build and push example Docker image (optional)
TIP
If you don't want to build the Docker image by yourself, you can use my pre-built image kezhenxu94/nginx-ssl-example:1.0.0 directly.
We are going to use a very simple example service - an Nginx server with the default index page, here is the Dockerfile:
FROM nginx:1.25.3

COPY nginx.conf /etc/nginx/nginx.conf
Let's build the Docker image and push it to a container registry:
docker buildx build --platform linux/amd64,linux/arm64 --push -t kezhenxu94/nginx-ssl-example:1.0.0 .
Deploy example service
In order to make it easier for you to modify the domain name and the image name, I'm going to use a Helm chart to deploy the example service, you can download the Helm Chart from this GitHub repository.
And here is the Helm chart values file:
image:
  repository: kezhenxu94/nginx-ssl-example:1.0.0
  pullPolicy: IfNotPresent
  tag: latest

replicas: 1
resources:
  cpu: 1
  memory: 500Mi

gateway:
  issuer:
    email: info@your-email.com
  hosts: &hosts
    - letsencrypt.kezhenxu94.me
  selector:
    istio: ingressgateway
  http:
    hosts: *hosts
  https:
    hosts: *hosts
in the gateway.hosts field, you should replace letsencrypt.kezhenxu94.me with your own domain name, and that's all you need to do.
Now let's install the example service with the Helm chart:
helm install letsencrypt-sample . --values ./values.yaml
After a few seconds, you should be able to see a Pod named cm-acme-http-resolver-xxxx, this is used for Let's Encrypt to verify your domain ownership:
kubectl get pods -A | grep acme
istio-system      cm-acme-http-solver-kckvx                             1/1     Running            0          11s
And the Pod will be deleted after your domain ownership is verified and the certificate is issued, you can check the certificate status by running:
kubectl get certificate -A

NAMESPACE      NAME                         READY   SECRET                       AGE
istio-system   default-letsencrypt-sample   True    default-letsencrypt-sample   4m30s
you can see the READY field is True, which means the certificate is ready to use.
Test the service
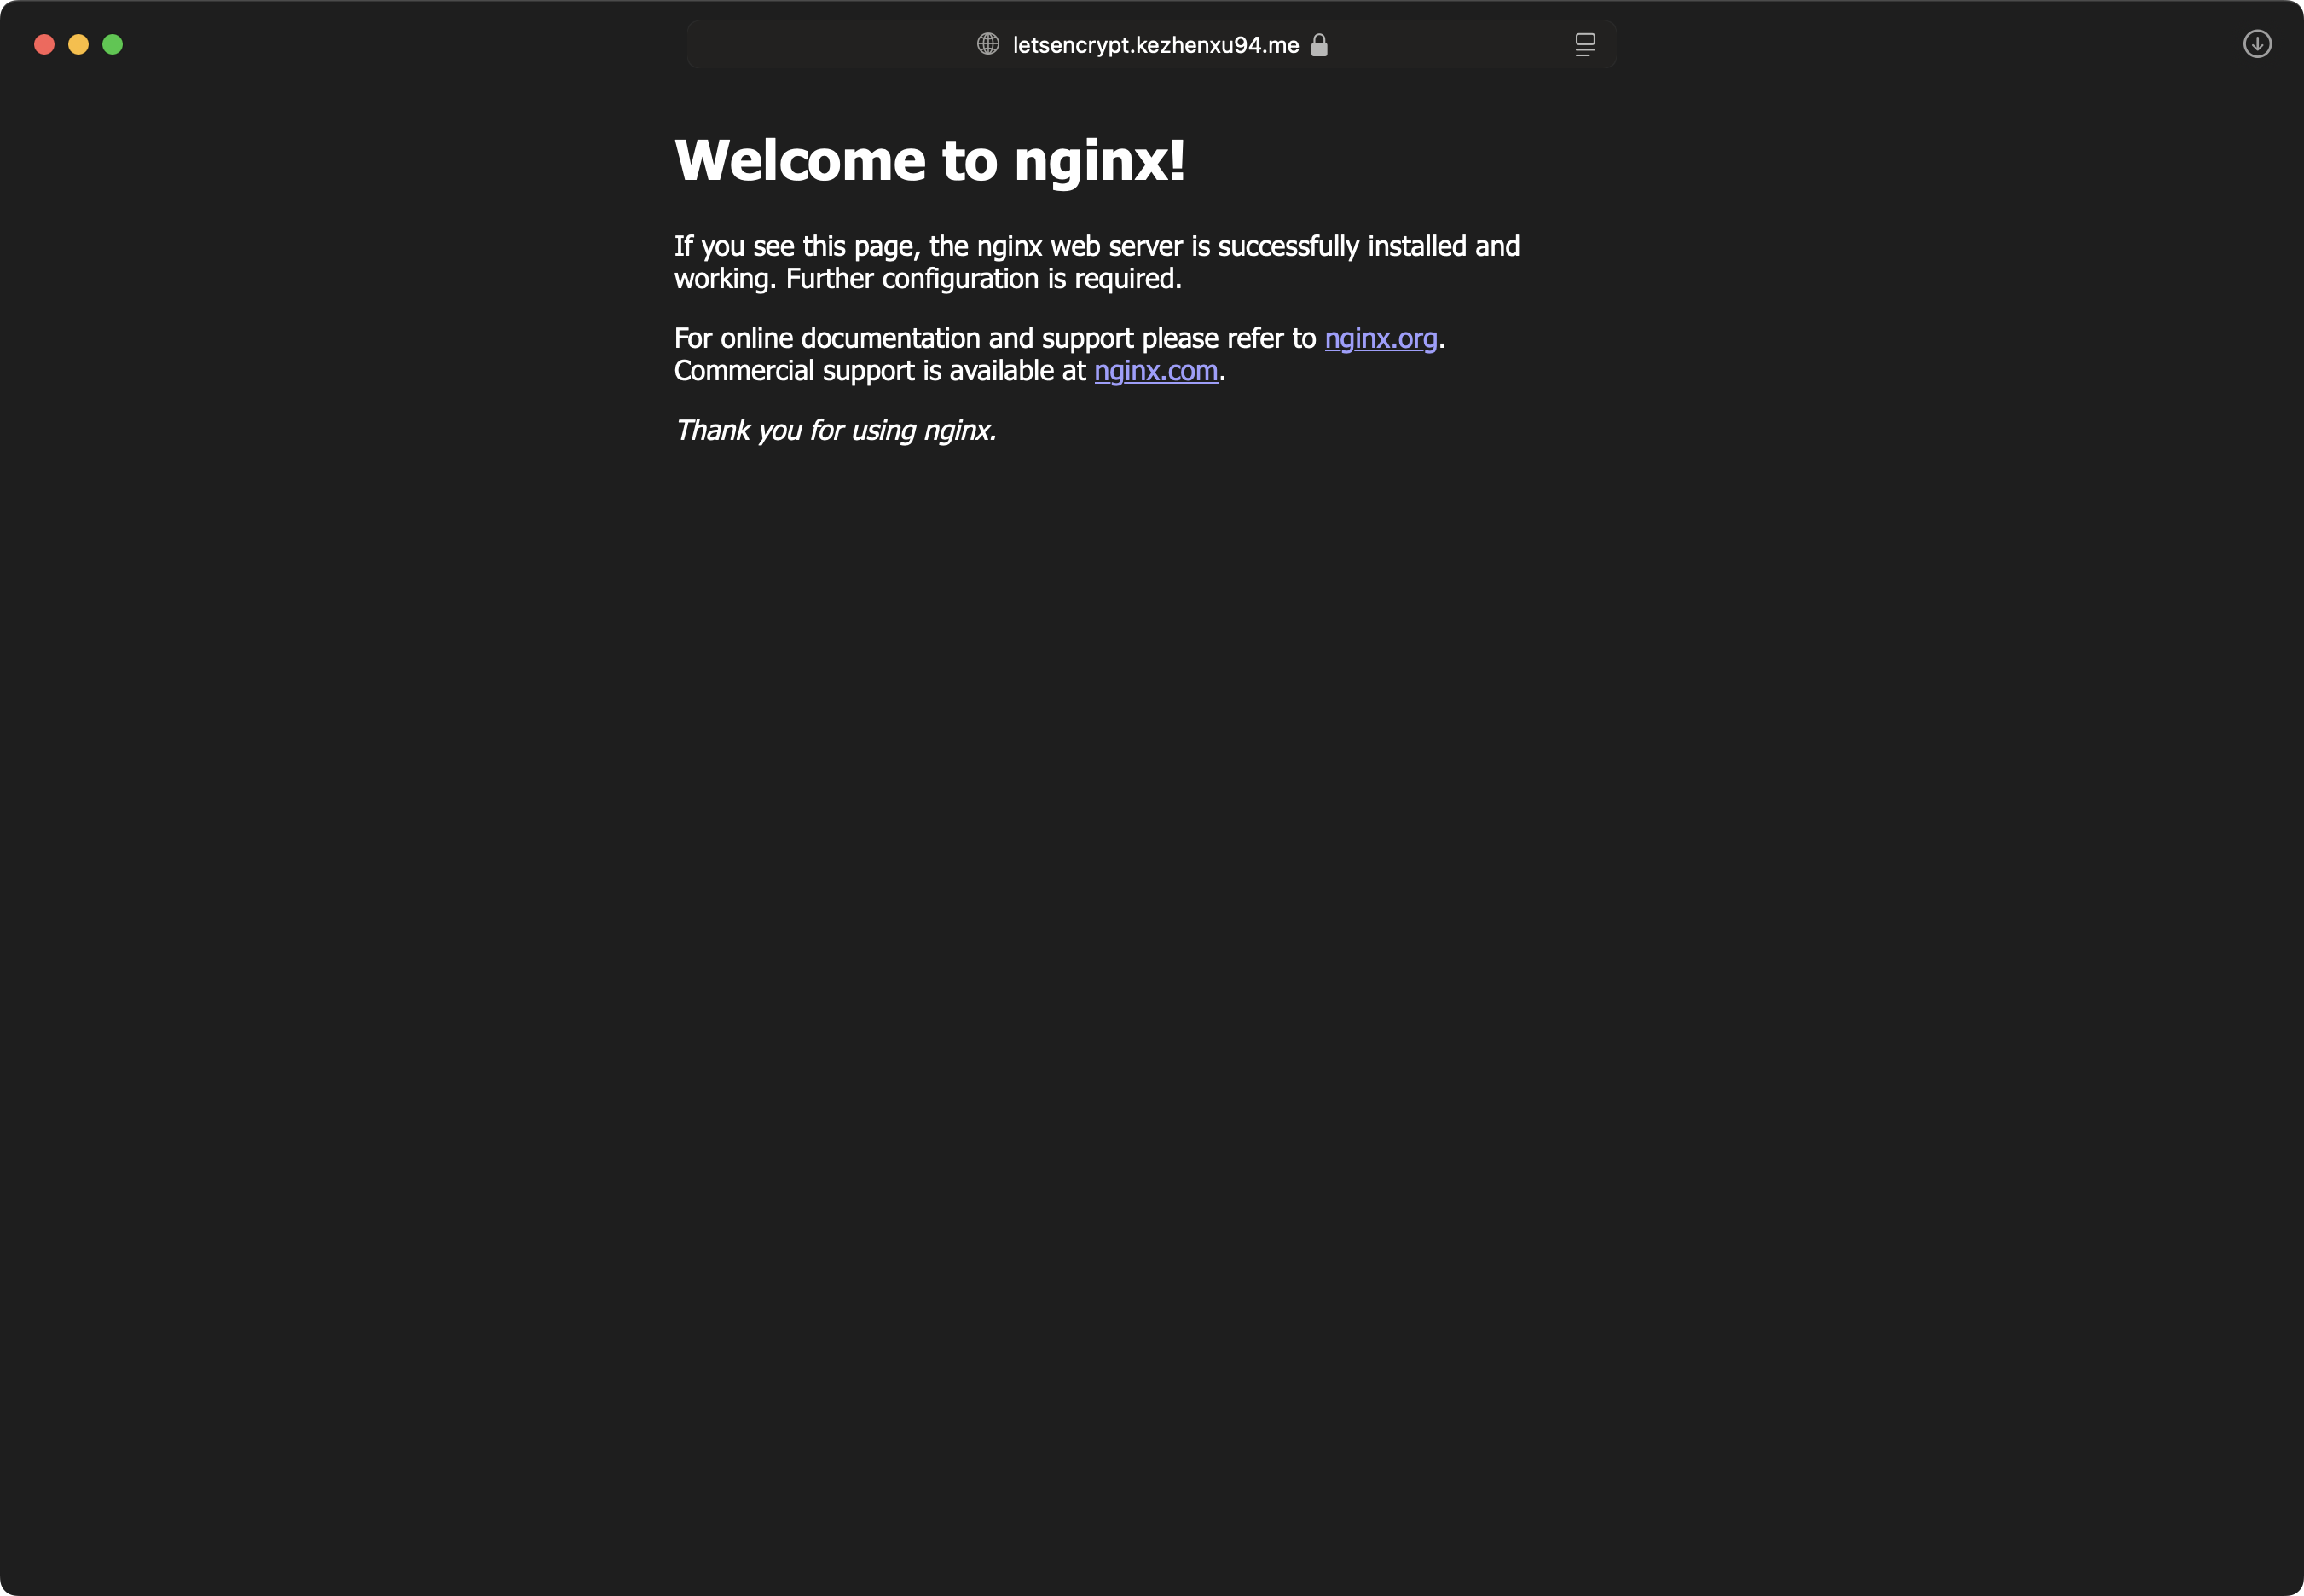
Now you can navigate to your domain https://letsencrypt.kezhenxu94.me in the browser, you should see the default Nginx index page, and the connection is secure with a valid certificate:
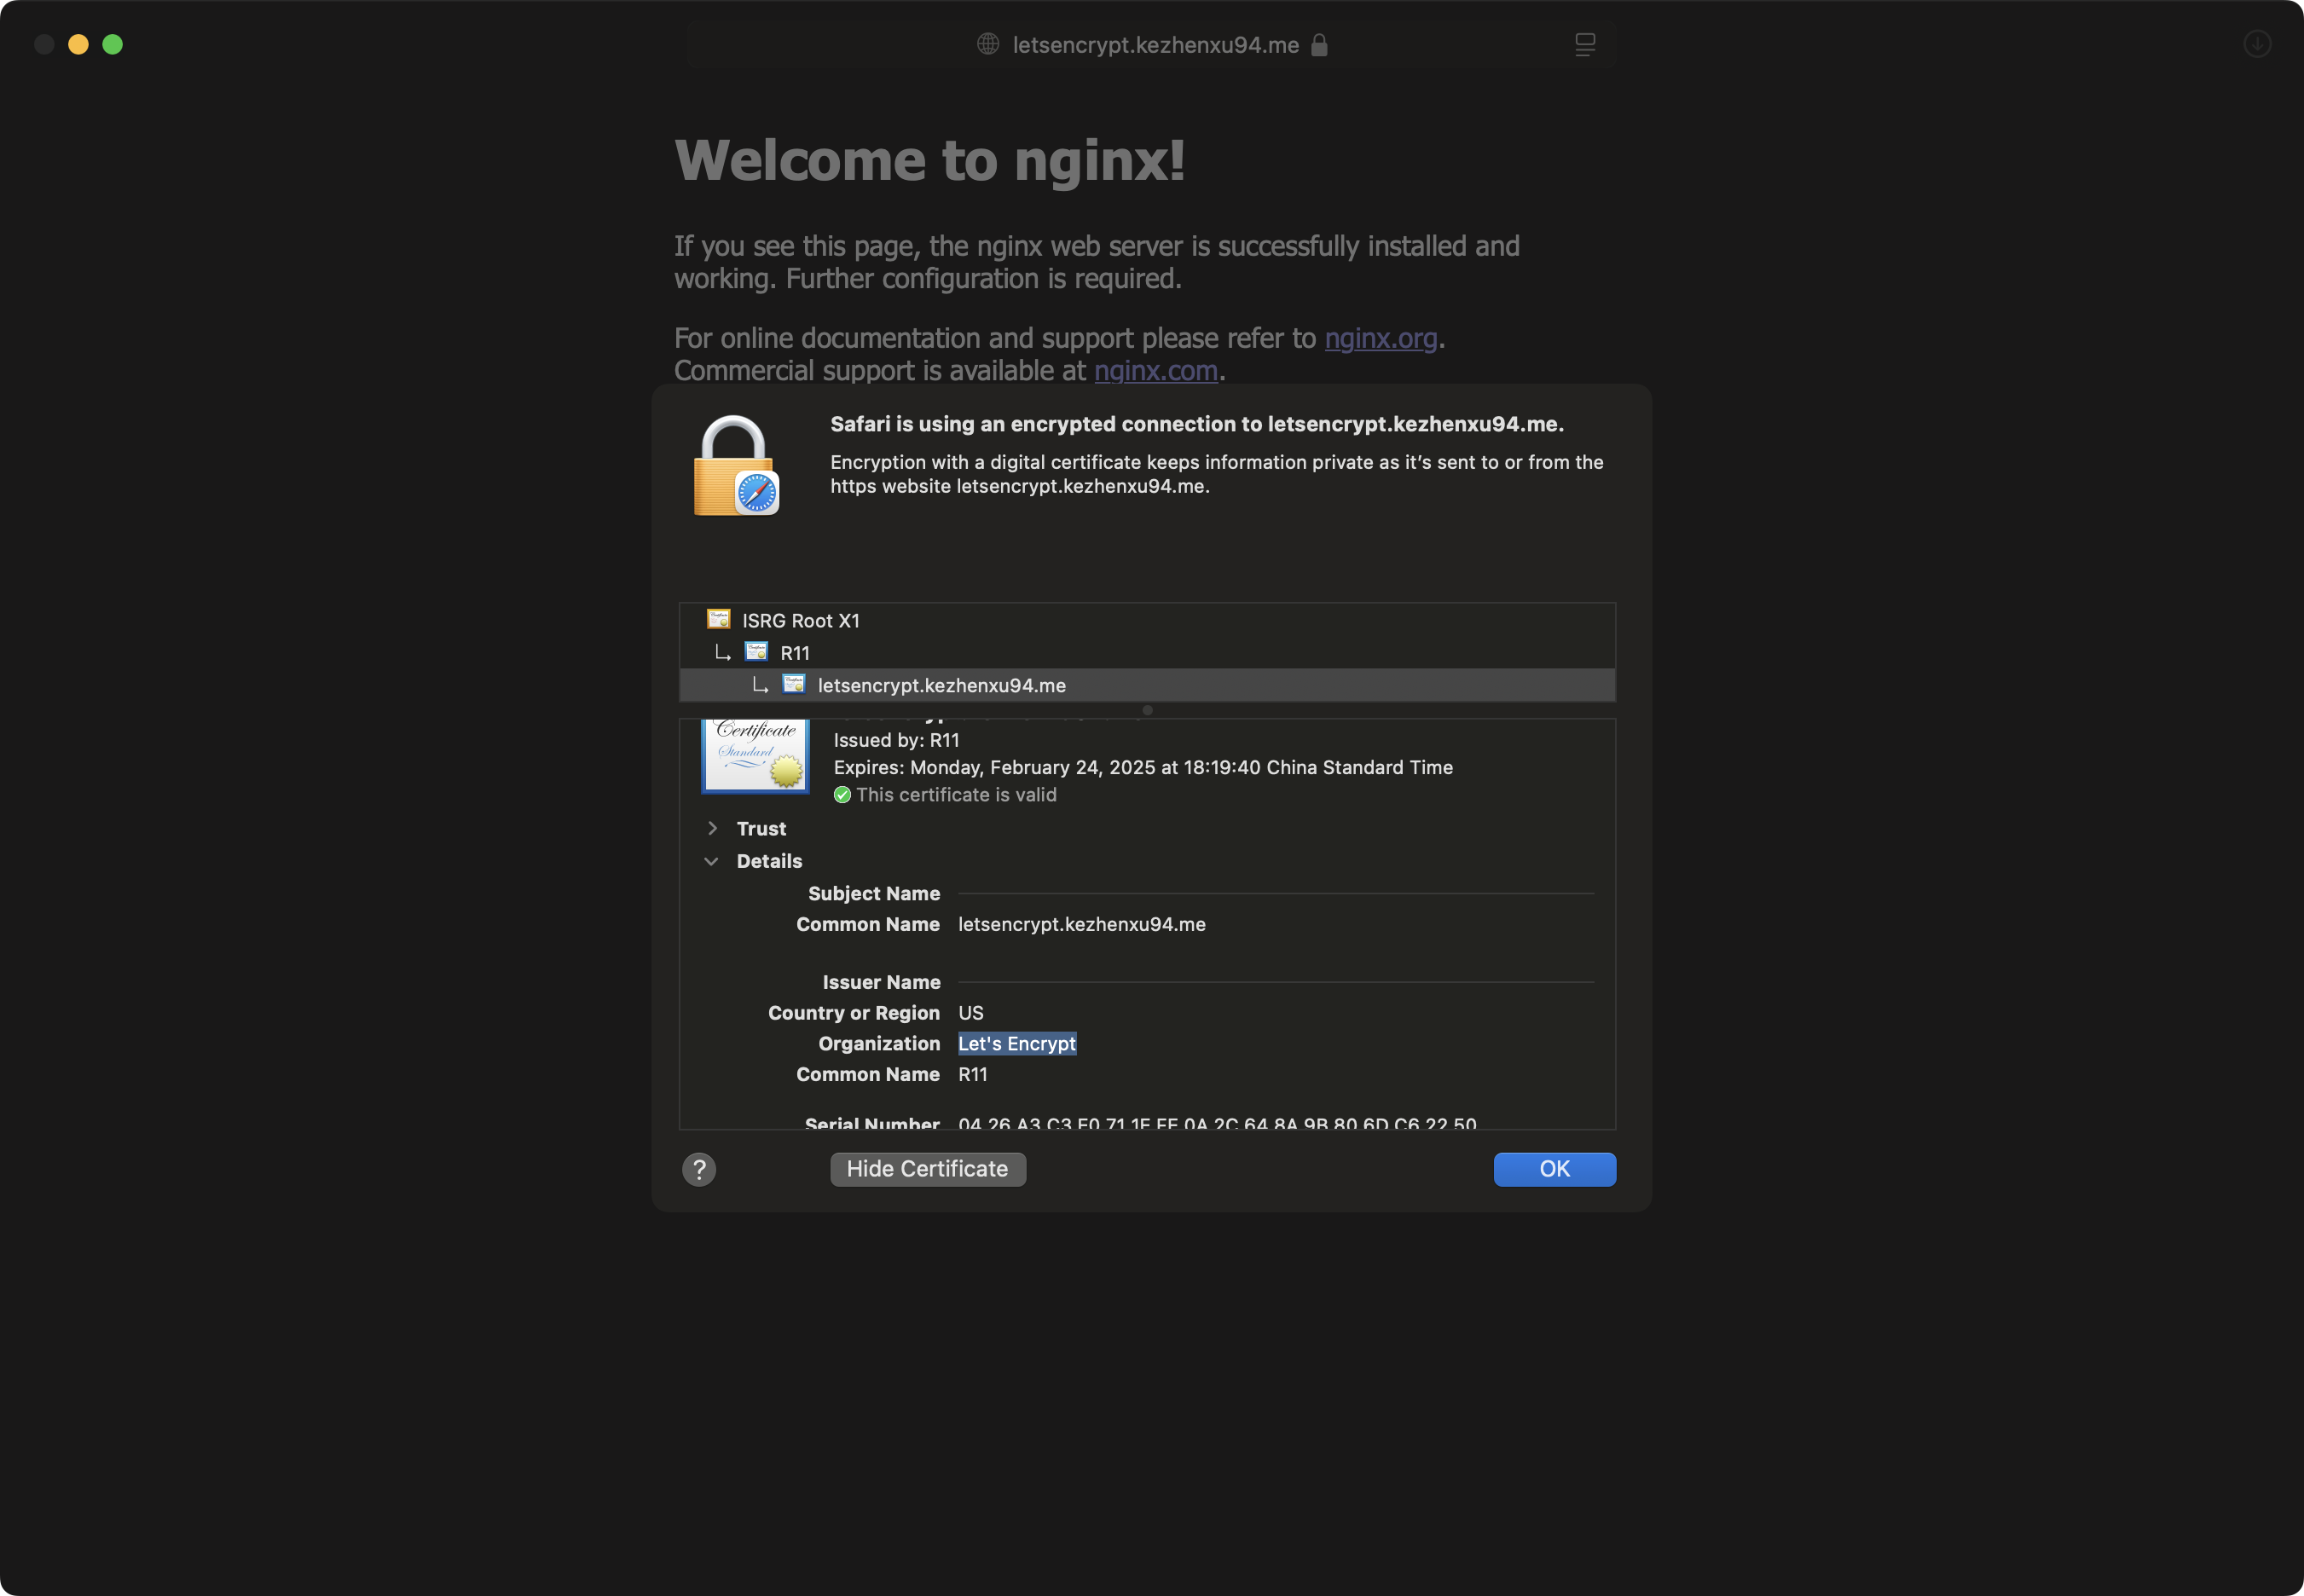
If you click on the lock icon in the address bar, you can see the certificate information:
It's a valid Let's Encrypt certificate, and it will be auto-renewed by cert-manager before it expires, so you don't need to worry about it.


